Monday 29 May 2017

1:35 Tamiya Panther G (Early) Part Five

1:35 Tamiya Panther G (Early) 

Part 5

As you probably know this kit was purchased cheap at Southern Expo as a base kit for demonstrating various weathering techniques at the Extreme Weathering Show. I thought it was a shame not to finish her so spent this weekend doing just that. I make no claim as to where or when this tank tank appeared in Europe it was mainly an exercise in weathering.

Painted with Meng/AK Interactive paints and weather with everything from Flory Washes and Piments to Mig Jeminez's latest Oil Brushers. 

Even though she a right hotch potch I rather like her and am quite pleased with the results.

This is how she looked after the demonstration at The Extreme Weathering Show


A right mix of weathering mediums and techniques and missing all its stowage.
So after a weekend of washes, pigments and finishing off the build, I got her looking like this.


Guess all she needs now is a suitably crafted base.


Sunday 14 May 2017

Revell 1:32 Colonial Viper Mk, II Part Two

Top Secret

Colonial Viper Mk. II

First impressions of the kit are that the moulds must be showing their age as there is plenty of flash supplied with the kit 😀 It is very obvious that the kit was originally boxed by Mobius as their name is on quite a few of the major parts. Revell not wishing to be left out have added their name to the underside of the fuselage. This needed to be sanded off, it only took a few swipes of the sanding stick as the plastic is quite soft.

Cockpit Assembly:
I decided to start with the cockpit, assembly is straight forward with just minor assembly of the main instrument panel and the side walls.

Once sprayed the instrument decals were applied. I then did a little light weathering with a neutral grey was and some dry brushed silver.


I then moved onto the pilot, after test fitting his arms there was two obvious areas that needed my attention; The joint of the top of the arms to the torso and the position of the the pilots right arm. Revell would have you build the kit with pilot  holding the control column in mid air. To overcome this I applied a little heat to the arm and bend it so that it adopted a move conventional position. I also extended the length of the column with some scrap sprue.


Test fitting of the pilot in the cockpit.


Next job will be to paint the pilot.

Thanks for looking.


Saturday 13 May 2017

Revell 1:32 Colonial Viper Mk, II Part One


Top Secret


The Viper (Mark I) was first introduced into Colonial service shortly before the outbreak of the first Cylon War. However, it was the Mark II Viper series, designed for use with the then new Colonial Battlestars, that is best remembered and celebrated. The Mark II was used throughout the first Cylon War and proved a capable fighter. Believed b many to be the reason that the Twelve Colonies didn't lose the war with the Cylons. The Mark II remained in service after the end of the war.
The Mark II was superseded by newer models, ending with the Mark VII serving in front-line duties and by the end of the war the Colonial Viper had served forty years. The Viper design was progressively updated and redesigned. It retaining the basic structural configuration which was essential for use with Colonial Battlestars. No information has survived about the intervening designs, but by the time the Mark VII was introduced the design had incorporated software-based controls and fully networked systems. This providing superior agility, battle management, and flight information for the pilot.
By the time of the second Cylon war the Mark VII had been upgraded to include navigational software designed and written by Dr. Gaius Baltar. This was the downfall of the mark as the software allowed the Cylons to remotely disable the Vipers during the opening engagements of the second war. The few Mark VIIs that survived the early battles were quickly stripped of the modern systems and software. The older Mark II fighters, not equipped with the more advanced systems, were unaffected by the Cylon modifications to Dr. Baltar's software. The last known two squadrons of Mark IIs were present in the Galactica's starboard flight pod in preparation for the Galactica's new role as a museum ship, and after most of the Mark VII squadron was destroyed by the Cylons, The mark II's were moved and prepared for combat by Galactica's deck crew.
The rag-tag Mark II Viper squadrons went on to defend the fleet for the entirety of the second Cylon war.
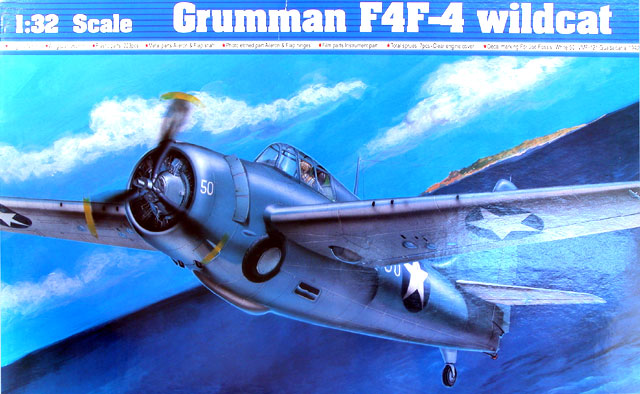
My tribute to this brave little SciFi fighter will be constructed from Revell's reboxing of Mobius' 1:35 kit. I will portray it as 2225NF the mount of Captain Lee 'Apollo' Adama. I will attempt to portray it looking the same as the boxart example, a well worn and battle weary example.


And so in to battle and my the Gods look out for us. 

So say we all

1:35 Tamiya Panther G (Early) Part Four

1:35 Tamiya Panther G (Early)

Part 4


Finally got the tracks and decals on, just about ready for the demo at the Extreme Weathering Show next weekend.

Just got a couple of little bits to do on it then its ready to give it a bit of character. Not sure how she will finish up yet as I will need to demonstrate all the 'finishes' that I can.

This how she looks at the moment. I'll try and take a few photos while I work on her at the show.


Watch out for the next update in a couple of weeks.

Thanks for looking.


Monday 17 April 2017

1:35 Tamiya Panther G (Early) Part Three

1:35 Tamiya Panther G (Early)

Part 3


Right here we go with this weekends progress. My time has mostly been taken up with trying to create Zimmeritt!

Starting with the upper hull, I used Vallejo Mr White Putty and a straight edge to create the Zimmeritt.


Next I moved on to the turret, once again using Vallejo Putty and a straight edge to create the Zimmeritt.

I then put all the component parts together to get an idea of what it is going to look like.


Next job was to start applying the paint. I'm usining AK paints that are bottled and packaged for Meng.


Thanks for looking there will be another update soon.


Sunday 9 April 2017

1:35 Tamiya Panther G (Early) Part 2


1:35 Tamiya Panther G (Early)

Part 2

All the work today has been concentrated on the finishing, painting and fitting of the wheels.


That's the time consuming part done.

More soon.

Monday 3 April 2017

1:35 Tamiya Panther G (Early) Part 1


1:35 Tamiya Panther G (Early)

Part 1

Started this the other day and been working on it on bits as I've been able to get to the bench.


This is primarily being built for a weathering demonstration I have been asked to do but Paul of Modelling Tools for his Extreem Weathering Show in late May.

Although I'm an occasional armour modeller this is going to be new territory for me, never having demonstrated any of my modelling techniques to anyone.


The version I'm building which is the same as the box art requires Zimmerit, which Tamiya don't provide but they do provide instructions on making your own with putty and a straight edge!


This was my attempt. I thought it looked a bit patchy but when looking at Zimmerit in photos it was not perfect, so I'm hoping my effort will past muster.


After starting on the road wheels and trying out AK interactive/Meng's German Tank colours the Zimmeritt looks okay to me.

Anyway this is as far as I have got to date. (And yes I know I have the rubber rims to do).

More soon.

Wednesday 29 March 2017

Part 3 1:32 Trumpeter F4F-4 Wildcat Work in Progress

1:32 Trumpeter F4F-4

Wildcat

Work in Progress Part 3

After a prolonged break due to a poorly laptop and a loss of 'mojo' there is a update on progress.

I'm glad to report that the engine is now finished and weathered. 


I also got the engine mount finished and weathered


Then the whole lot along with the finished cockpit was added to the fuselage.


Finally the fuselage halves where put together.


This project is now on hold as I have to get another build started so that it's ready for a weathering demonstration I have been asked to give at a local model show.


Sunday 26 March 2017

Revell Anakin Skywalker's Eta-2 Actis-class interceptor

Revell
Anakin Skywalker's Eta-2 Actis-class interceptor


With the arrival of the new interceptors, Anakin began using this star-fighter instead of his yellow Delta-7B. He flew his Eta-2 in numerous battles during the closing days of the Clone Wars, proving time and again his superiority as a pilot. Often at his side was his former MasterObi-Wan Kenobi, Although he was impressed with Anakin's skill, Obi-Wan often remarked on Anakin's reckless piloting. Obi-Wan and other Jedi were also concerned about Anakin's obsession and possessive attitude toward the ships he had for personal use. Saesee Tiin, however, often encouraged the young Jedi Knight to continue making modifications and enhancements to his ships.

The Invisible Hand was a modified Providence class Star Destroyer and one of General Grievous's flagships and was the command ship for the Battle of Coruscant. It was during this assault that Anakin used his interceptor's weapons to disable the Hand's hangar shields. Anakin with Obi-Wan then crash-landed their ships inside that starship's hangar bay, After a protracted assault fought by Anakin and Obi-Wan the Invisible Hand was destroyed after it plummeted into the atmosphere of Coruscant.

It is from the above engagement that I have based this build.


The kit is Revell's 1:53 offering and is a really simple kit. So much so it is very nearly a snap together kit, but for £5 what more can you ask?  

I have painted it with a mix of Vallejo and AK Interactive paints and weathered with Mig Ammo washes.
The base is a square of MDF donated by Sean of Topnotch Models, again painted using Vallejo and AK Interactive using a screen grab from the Star Wars Film The Revenge of the Sith as a guide. 

Thanks for looking.


Sunday 15 January 2017

Part 2 1:32 Trumpeter F4F-4 Wildcat Work in Progress

1:32 Trumpeter F4F-4

Wildcat

Work in Progress Part 2

Today's efforts was aimed at finishing off the cockpit and starting the engine assembly. The morning was mostly taken up with assembling the HGW seat harness and adding it to the cockpit.


I am aware that the harness should go over a bar above the seat. However, the bar is moulded to the bulkhead and I'm not that good scratch building 😟

Next I worked on the cockpit side pieces, I've had to guess at the colours of buttons, knobs and levers (Trumpeter would have you paint them all 'steel' and leave it at that!).


I'm quite pleased with the way the cockpit has turned out. 

Next I moved onto the engine, (Once again the Trumpeter instructions a woefully inadequate in the painting guide.) So I have copied the colours from some reference photos a friend sent me.  


 I still have the cylinder heads to attach and I will be adding the ignition leads using lead wire. That will be started the next time I get back to the bench.

Saturday 14 January 2017

Part 1 1:32 Trumpeter F4F-4 Wildcat Work in Progress

1:32 Trumpeter F4F-4

Wildcat

Work in Progress Part 1


I picked this kit up in a deal at my local kit swap just before Christmas. It very quickly became the kit in my stash that I really wanted to build.
Having built a Trumpeter kit before I know that the decals can be a little on the thick side so I opted to go for some after market decals.  After a browse on the Interweb I settled on decals from Techmod. 
Whilst I was in I buying mood I also picked up a Mondex Mask set for the canopy and because the kits has neither moulded or Photo Etch seat harnesses I opted for a set of HGW. I've used these before and love the look of them. Realising that I have no suitable paint I once again opted for MR. Paint.


I quickly taped the two fuselage halves together to get an idea of the overall size of the model.


I realised that the six inch square space on my bench wasn't going to be enough space to build in so first job was to clear the bench 😀


Bench cleared it was time to start building. Like most kits construction starts with the cockpit. As I started construction I noticed that the instructions is sadly lacking in the painting guide department! So research is the order of the day. 
Construction of the basic cockpit of the Wildcat is really simple and the parts go together well, albeit there is not a lot of detail 😒


Next I'll add the HGW harness, side panels and weather the cockpit a bit more